People Section : Inviting Users To Tydy
Inviting a Single user
In order to invite a Single user to Tydy. Please follow the below steps.
Make sure you log in to Tydy with an admin account. If you are not sure about the access you currently have, request you to please read through this article first. - “Access Article”
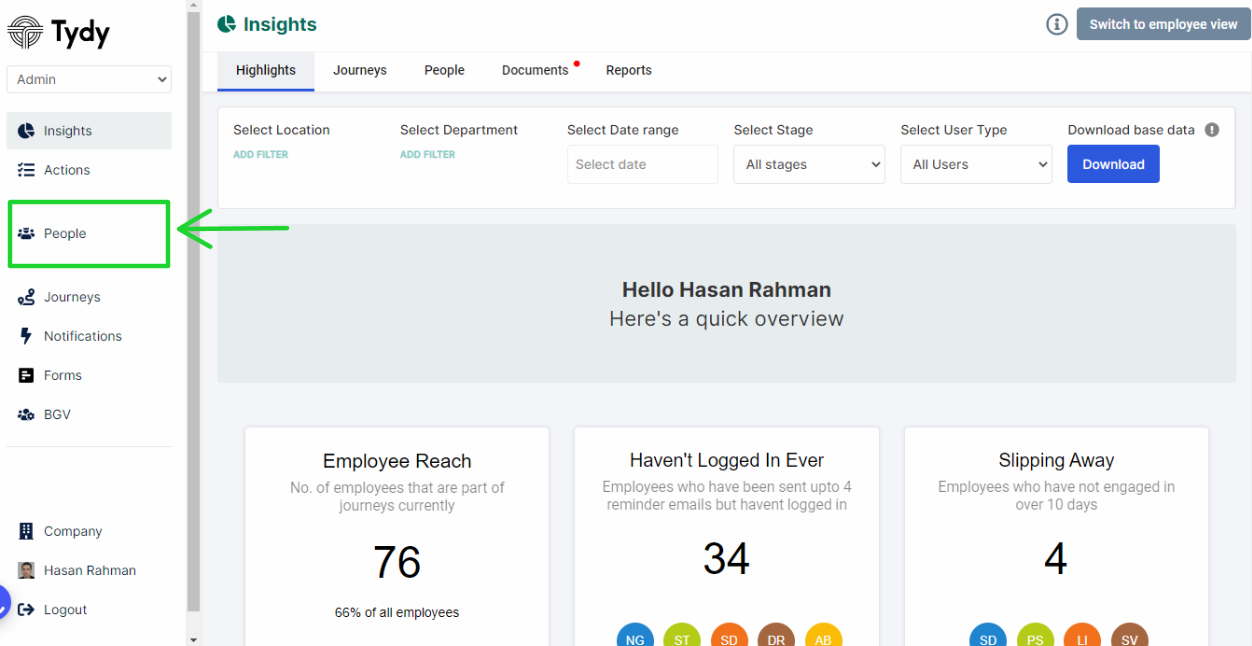
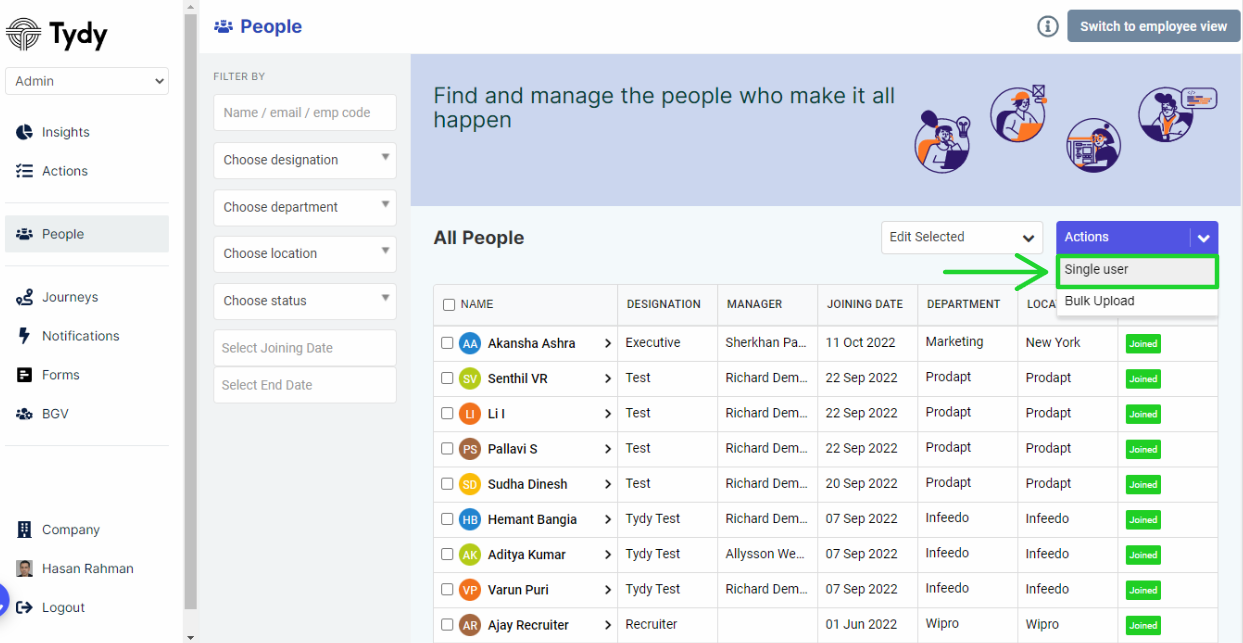
Once you have logged in to Tydy, click on the “People” Section.
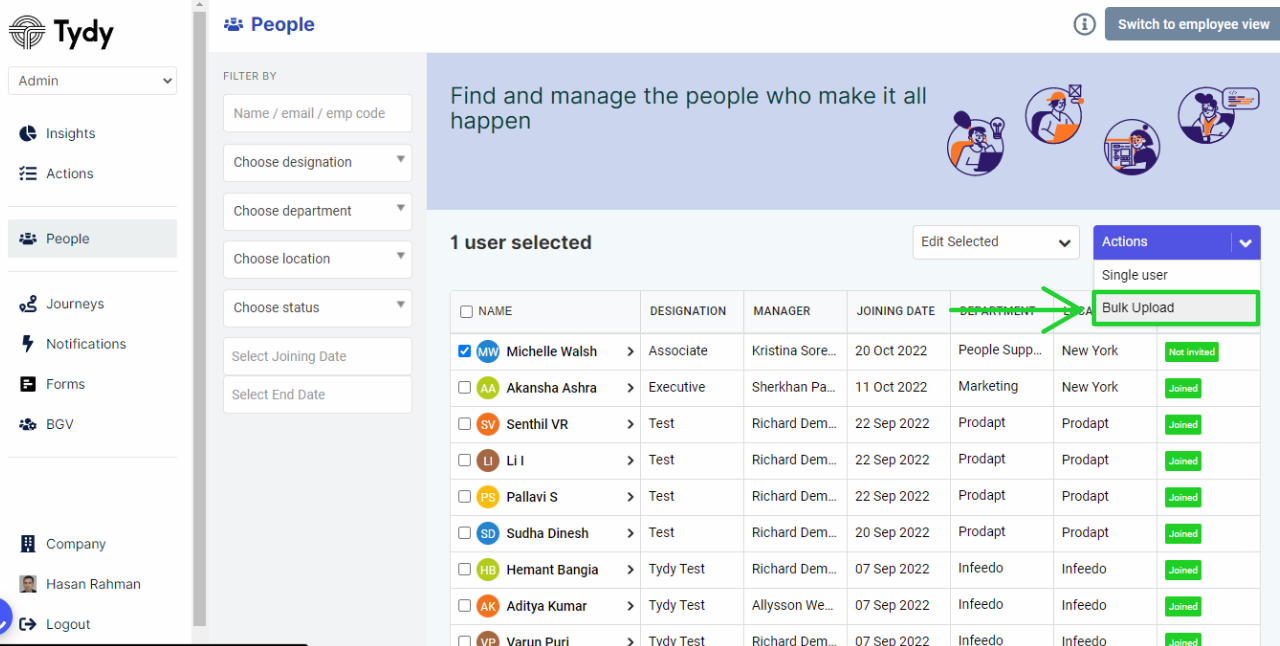
Hover over the down arrow next to “Actions” Tab, which is on the extreme right and select “Single User”.

By default, you will be inviting a “New hire”.

Please fill in the details under Personal Details, Employment Details, Onboarding Details, Key People, and Custom Details if any.
While adding “Key People” to the candidate, please select the Key people from the drop-down populated after typing in the name or the email address. This helps in validating the key people.

You may also assign a “Journey” to the candidate by selecting “Assign Campaign”.
If you would like to what a “Journey” is and how it is useful for onboarding, please read this article - ”Journey Article”

Once you have filled in the above details, Select “Invite Person”.

Once after clicking on “Invite Person”. The candidate will receive an invite from Tydy to the email ID mentioned under “Personal Details”.
Inviting bulk users
In order to invite bulk users to Tydy. Please follow the below steps.
Make sure you log in to Tydy with an admin account. If you are not sure about the access you currently have, request you to please read through this article first. - “Access Article”
Once you have logged in to Tydy, click on the “People” Section.

Hover over the down arrow next to “Actions” Tab, which is on the extreme right and select “Bulk Upload”.
You will now to redirected to a new web page, where you will find two options.
Option One - Add users from .CSV file (Download sample CSV) - Bulk Upload
Option Two - Update users from .CSV file (Download sample CSV) - Bulk Update
In order to add users in bulk, we will have to upload a CSV file with the required fields with the information of users as updated while adding a single user.
You may download the sample CSV file from Option One - Add users from .CSV file (Download sample CSV) and set your data of the users according to the same fields and format.

Once you have a CSV file with details of all the users to add, in the same structure as the sample CSV file, you may either drag and drop the file onto the “OPTION ONE” or upload the file from your system.
Once the file is uploaded, select “Bulk Add”.

Now you will have to match the attributes with the field name on the CSV file accordingly. Ex: The attribute “First Name” should be matched with the field where the “First name” is added on the CSV Uploaded.

Once after matching the attributes with the fields correctly, select “Submit” at the bottom right.

Now all the added users will receive an invite from Tydy when uploaded successfully.
If in case the attributes or format are not matched, tydy will throw an error file with an explanation of the error.
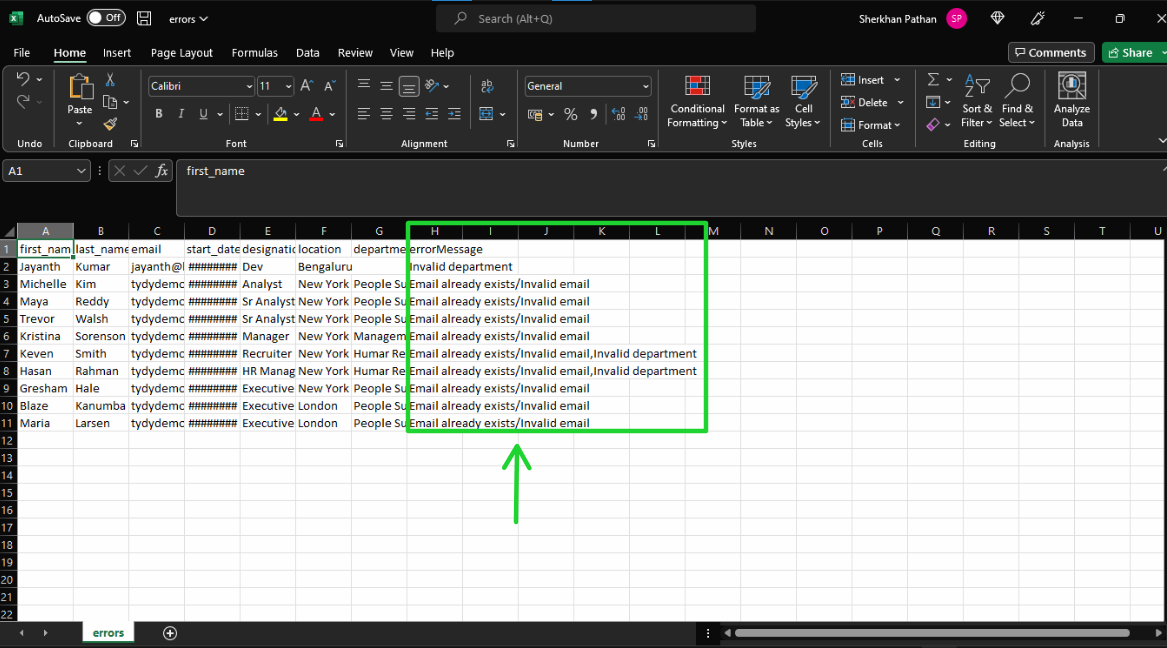
Fix the error and reupload the file again.
Adding a user but not inviting him/her to Tydy
This use case comes into play when you would like to add a user for now but invite him/her at a later date.
Make sure you log in to Tydy with an admin account. If you are not sure about the access you currently have, request you to please read through this article first. - “Access Article”
Once you have logged in to Tydy, click on the “People” Section.

Hover over the down arrow next to “Actions” Tab, which is on the extreme right and select “Single User”.

By default, you will be inviting a “New Hire”.
Please fill in the details under Personal Details, Employment Details, Onboarding Details, Key People, and Custom Details if any.
While adding Key People to the candidate, please select the Key people from the drop-down populated after typing in the name or the email address. This help in validating the key people.
You may also assign a “Journey” to the candidate by selecting “Assign Campaign”.
If you would like to what a “Journey” is and how it is useful for onboarding, please read this article - ”Journey Article”
Once you have filled in the above details, Select “Add but do not invite to Tydy”.

Once after clicking on “Add but do not invite to Tydy”. The candidate will be added to the Tydy platform but will not receive any invite from Tydy.
At a later stage if you would like to invite the person who is already added but is not invited, Please follow the below steps
Once you have logged in to Tydy, click on the “People” Section.
Search for the user under “Filter By”.

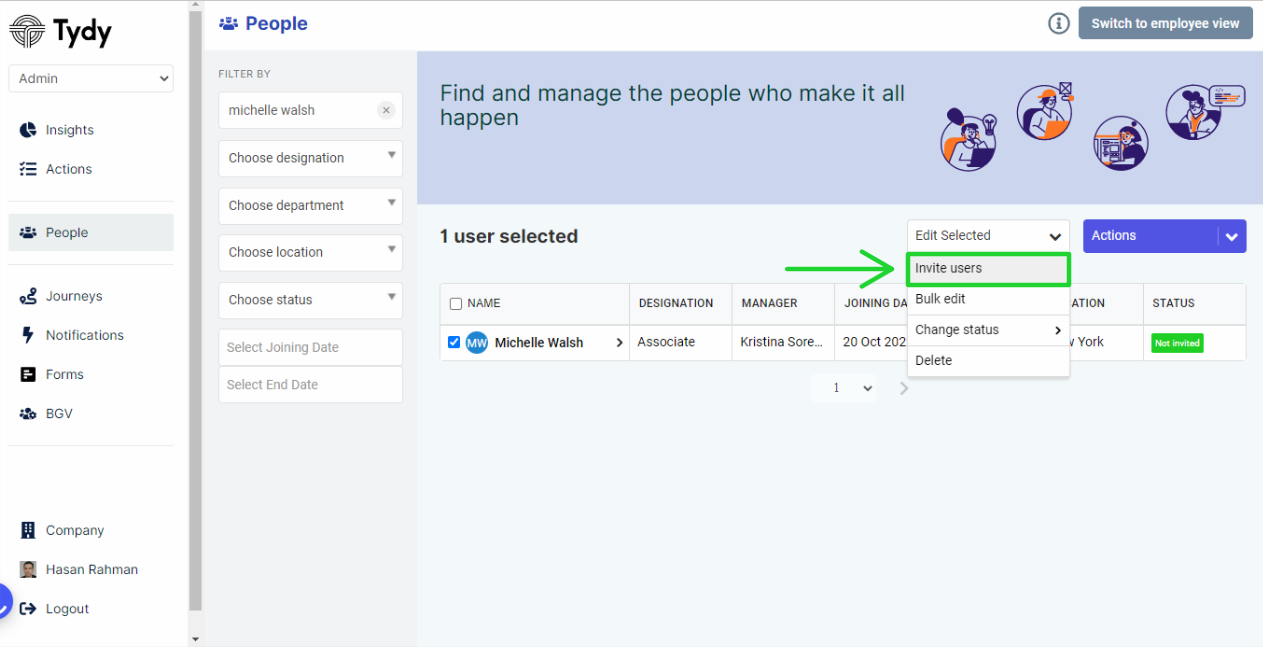
Once the user is located, Select the user by clicking the check box before the user name. The status of the user is “Not Invited”
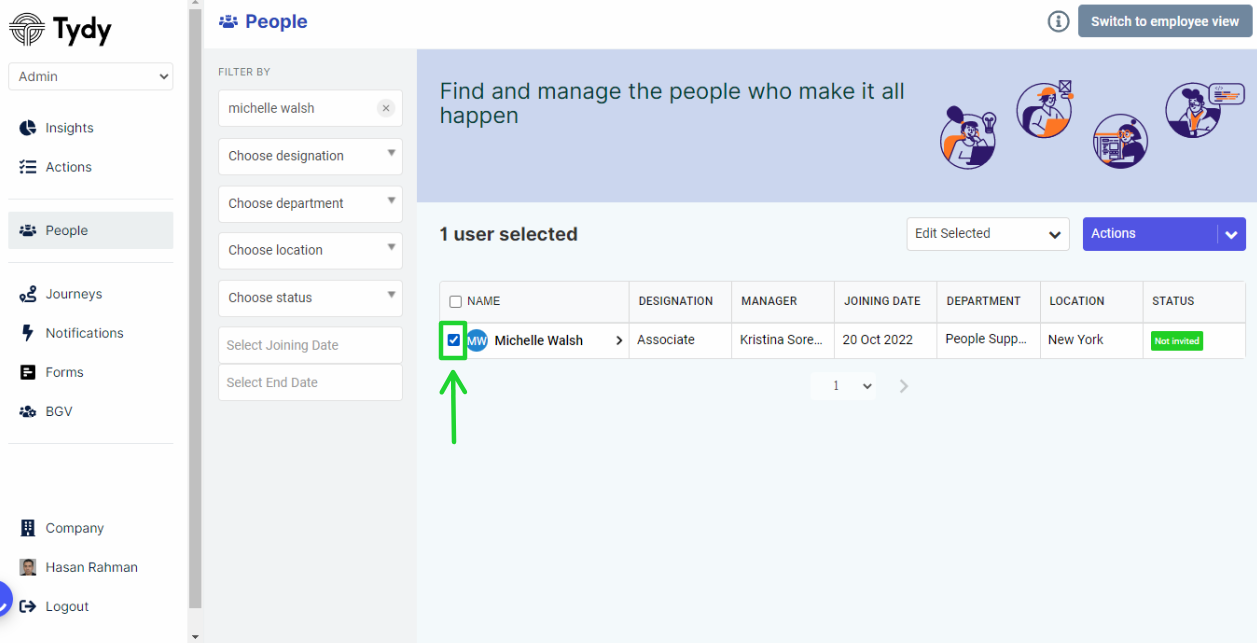
Hover over the down arrow next to “Edit Selected” and select “Invite users”. You may also select multiple users at once and invite them all together.
Now all the users selected and invited will receive an invite from Tydy.
Adding an existing employee to Tydy.
Make sure you log in to Tydy with an admin account. If you are not sure about the access you currently have, request you to please read through this article first. - “Access Article”
Once you have logged in to Tydy, click on the “People” Section.

Hover over the down arrow next to “Actions” and select which is on the extreme right “Single User”.
By default, you will be inviting a “New Hire”. Please select “Existing employee ” instead.

Please fill in the details under Personal Details, Employment Details, Onboarding Details, Key People, and Custom Details if any.
While adding “Key People” to the candidate, please select the Key people from the drop-down populated after typing in the name or the email address. This help in validating the key people.
You may also assign a “Journey” to the candidate by selecting “Assign Campaign”.
If you would like to what a “Journey” is and how it is useful for onboarding, please read this article - ”Journey Article”
Once you have filled in the above details, Select “Invite Person”.
Once after clicking on “Invite Person”. The candidate will receive an invite from Tydy to the email ID mentioned under “Personal Details”.
Related Articles
People Section: Additional Tasks
We will now look at more important actions to be performed by Recruiters in this Section. Changing the Status of the Candidates As you login to Tydy , select People section as shown. Search for the candidate in the filter . Select the candidate and ...Tydy turbocharges HR efficiency with IDfy integration
Tydy raises the bar in employee data precision with seamless IDfy integration At Tydy, our commitment to revolutionizing the Employee Data Platform experience has reached new heights with our recent integration of IDfy's cutting-edge identity ...TYDY Control Centre
Tydy Control center is the central nervous system which helps initiate and facilitate various processes that are managed by Tydy for the Organization. As you can see in the image above there are various features present in Control Centre listed below ...Help Section (HR, IT, Operations)
Over here we will be answering your questions on most used features on Tydy by recruiters and Admin Team How Can Invite Existing Users to Tydy ? 1. Login To Tydy with Admin account and select People section 2. Search for the candidate in Filter with ...Help Desk For New Hires
We are here for you ! We are here to help you with some Frequently asked questions by New Hires to access the Tydy Platform How do I change my password? Please click on your “Profile” section, which is on the left top corner of the home page. Select ...